

Need more disk space on your Windows 2012 Server (Datacenter Edition, or similar Windows OS) storage space? If you have additional empty drive slots available, there is an easy solution.
To add additional hot swappable SAS drives to a Dell PowerEdge R720, you would need to add more storage to the server, assuming there are extra drive slots. No need to get into old fashioned RAID S/W or access special menus. Hot swaps mean the bezel front cover of the Dell Server can be removed, and the drives can simply be inserted. They light up automatically, and can now be configured within Dell OpenManage software.
Here are the steps:
- Manually insert the drives: in this example, 4 SAS, 3 for RAID 5, 1 for Dedicated hot spare
- Download the latest Dell “OpenManage” version, and install it as directed
- Open the Dell “OpenManage” web interface
- Verify the Physical disks show up as inserted
- Go to Storage, then to PERC H710P (Embedded), or similar depending …
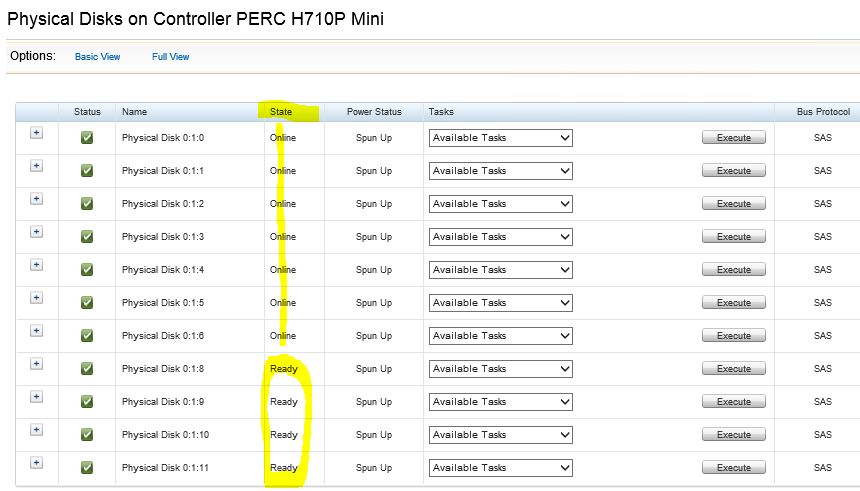
- Go to Connector, Enclosure, Physical disks – are the new ones there?
- They should say “READY” under the new drives, as below
- Under available tasks, for ea. drive click ‘blink’, then ‘execute’ if server is accessible
- This verifies you are working on the correct drives. Now ‘unblink’ the disks!
- Open Virtual Disks, note the new disks are not part of a virtual disk yet, but previous virtual disks should be listed.
- Open “Go to the Create Virtual Disk Wizard”
- Use “Express Wizard”, Raid 5, label it appropriately, like “2nd Raid Storage”, accept size default
- Check the box under “Assign Dedicated Hot Spare”
- Hit Finish, then verify the new virtual disk was created. One more easy step …
Finally, in a separate tool, open Computer Management and then Disk Management tool.
- They need to be used to formally add or introduce the new disks to the Windows 2012 operating system – an “Initialize Disk” (GPT) prompt should come up, select ok
- Look for the ‘Unallocated’ Disk (Disk 3 or 4, depending on your scenario – should be on the bottom): right click over ‘unallocated – New Simple Volume’, hit Next, accept default size, assign a drive letter of your choice, edit the label (optional) to something like, “EXTRA STORAGE”
- Otherwise defaults are usually good, finish up and voila, oodles of additional storage space to use!